



Templates & fields
Template wizard
Templates define which metadata fields and which tasks a checklist created from them gets. Both creating and editing a template go through the same four-step wizard.
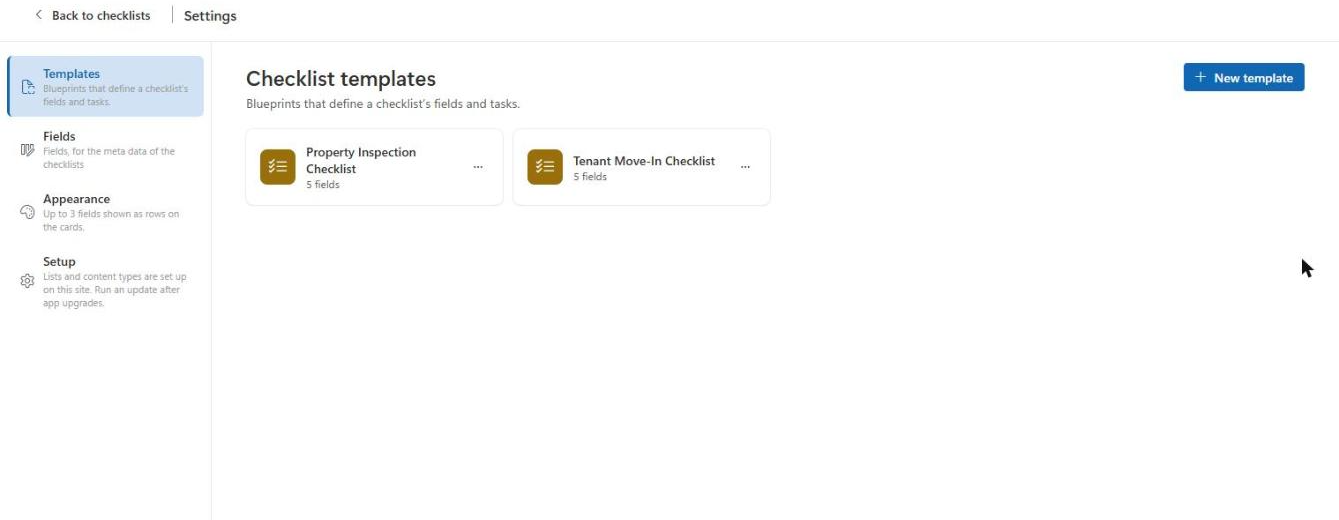
Open the settings and switch to «Templates». All existing templates are shown as cards; clicking a card opens it for editing, and the context menu («…») lets you delete a template as well:
Note
The previous, separate dialog for editing existing templates has been replaced by the wizard. When editing, all four steps can be jumped to directly, since the data already exists in full.
Step 1 — Details
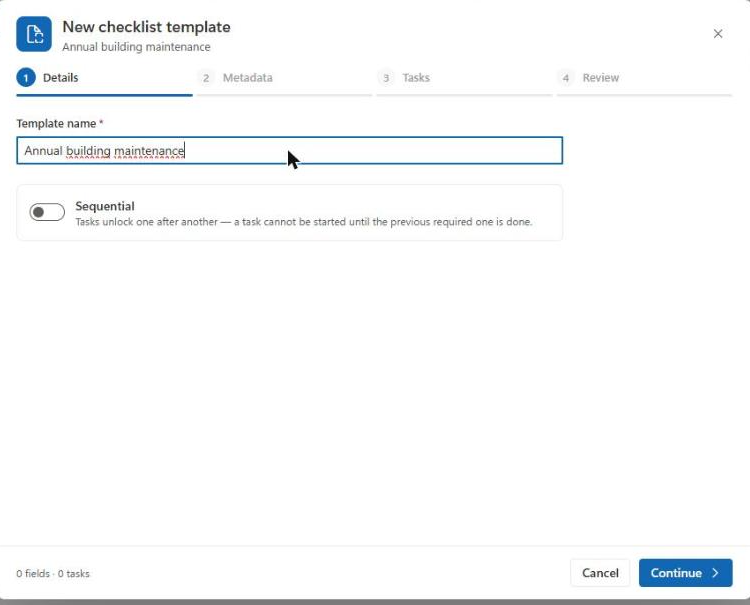
Enter the name of the template and decide whether checklists created from it must be completed sequentially. In sequential checklists, each task only unlocks once the previous one is completed or marked «not required».
Step 2 — Metadata
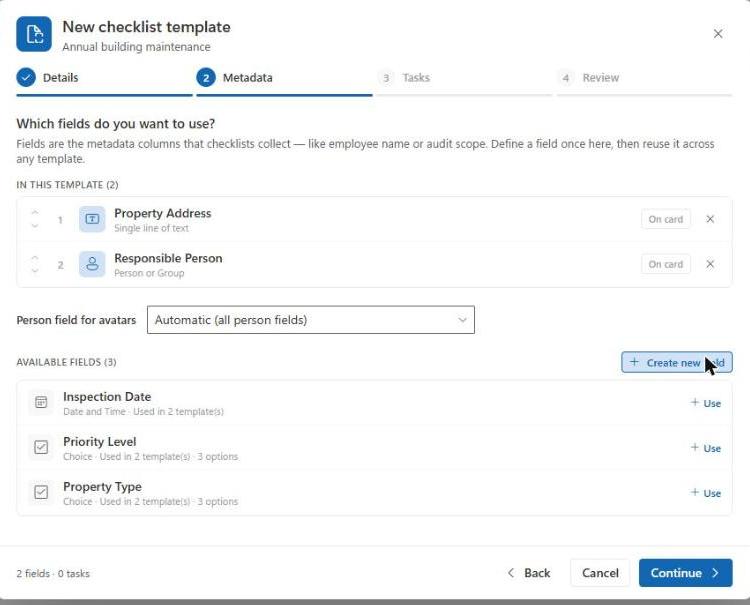
Choose which custom fields this template should use. Already-selected fields can be reordered using the arrow buttons — the order determines how the fields appear on the checklist later. Use «Create new field» to add a new field right from the wizard, without leaving the settings.
If the template contains at least one person field, you also choose which one feeds the avatars on cards and the board, as well as the «Assigned to me» tile. Each field also has a «On card» toggle to decide whether it appears on the checklist cards (up to three fields).
Step 3 — Tasks
For new templates, two modes are available:
Bulk paste (smart paste) — paste an entire task list from Word, Excel, an email, or anywhere else. Checklists automatically recognizes:
- bullets and numbering are stripped
- a line ending in «:» starts a new group (e.g. «Heating & plumbing:»)
- «(optional)» marks a task as not required
The recognized tasks appear as a live preview; use «Add … task(s)» to add them to the template, or «Append to existing» to add them to tasks you already entered.
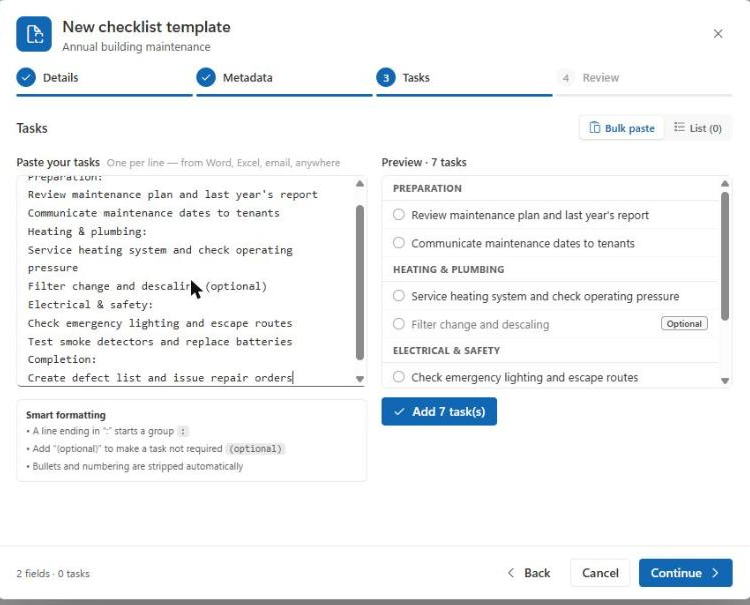
Bulk paste (smart paste): the text input field with the pasted list on the left, and the live preview with recognized groups and optional tasks on the right. List editor — add tasks one by one, or continue editing the list produced by smart paste. Each task lets you set a title, group, «Optional» flag, and — after expanding it — a rich-text description and an assigned person. Tasks can be reordered using the arrow buttons.
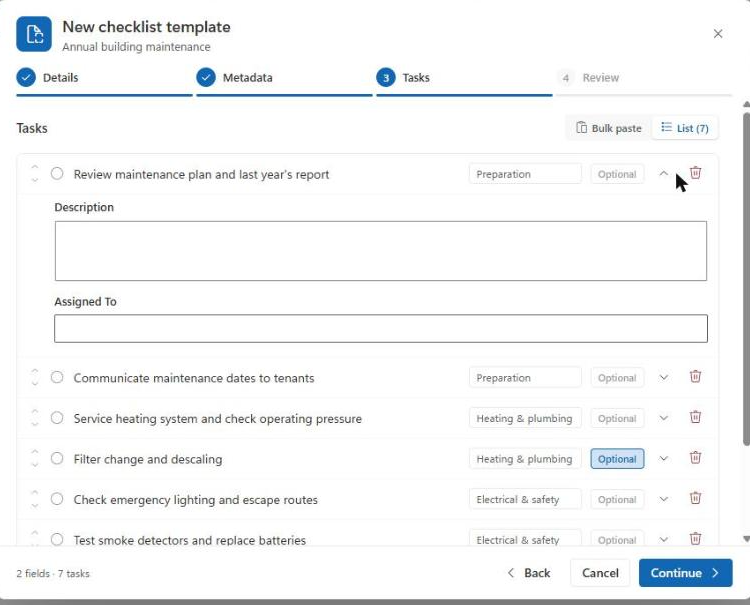
The list editor with several rows (title, group, Optional badge, assigned person) and an expanded detail view with a description.
When editing an existing template, only the list editor is available; new tasks can still be added at any time via «Bulk paste».
Step 4 — Review
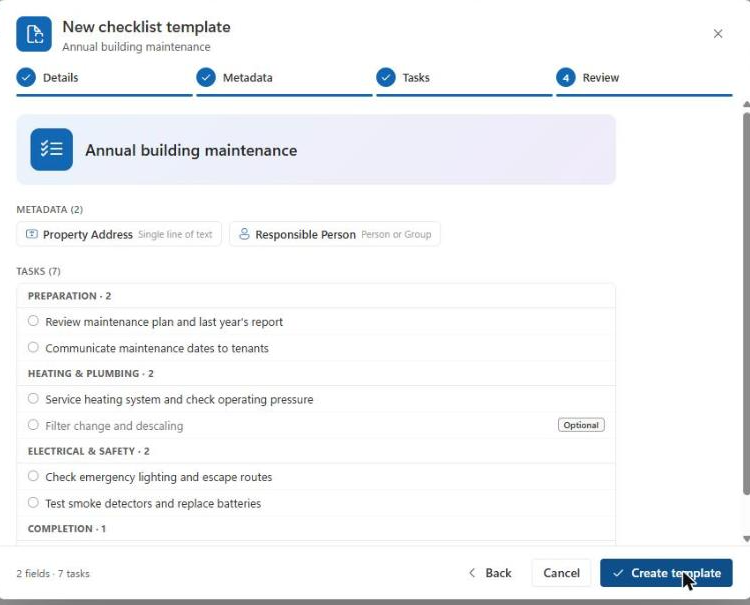
The final step summarizes the name, the sequential setting, the selected fields (including card fields and person field), and all tasks, grouped. When editing, it also shows how many tasks were added, changed, or deleted. Click «Create template» or «Save» to apply your changes.
Note
A template can be adjusted at any time. Changes are not applied retroactively to checklists that already exist — only newly created checklists pick up the current state of the template.